1. Aesthetic Appeal: Style and Design Flexibility Is It Better to Use Wallpaper or Paint for Modern Interiors? When it comes to modern interior design, aesthetics play a huge role…
You’ve rolled the first coat, stepped back, and spotted streaks, patchy colour, and a faint reminder of the old feature wall. Does it need another coat, a different roller, or…
You can spend weeks choosing the perfect wall painting services, only to discover it looks completely different once the room is painted. Sometimes the colour isn’t the problem—it’s the sheen.…
Painting your home can be a lot of fun, but let’s be honest: DIY painting doesn’t always go as planned. Even small mistakes can make your walls look messy or…
Painting your home can completely refresh its appearance, but before any brush touches the wall, ensuring that your walls are in good condition is crucial. Repairing wall damage before Residential…
Selling a residential property is both a financial and emotional decision. Homeowners often face a critical question before listing their property on the market: Is interior house painting worth it…
House painting in Australia is uniquely challenging due to the country’s diverse and often extreme climate. From intense UV radiation and scorching summer heat to high humidity, sudden rainfall, and…
Commercial painting is a specialised craft that demands more than simply applying a coat of paint. In Melbourne, professional painters combine technical skill, precision and extensive knowledge of materials to…
You’ve rolled the first coat, stepped back, and spotted streaks, patchy colour, and a faint reminder of the old feature wall. Does it need another coat, a different roller, or a complete rethink?
If you’re wondering how many coats of paint for interior walls painting will give you a proper finish, two finishing coats are the usual starting point, with a suitable primer or sealer where required. Taubmans recommends two topcoats, whether or not the surface needs a preparatory coat.
The important part is knowing what your particular wall needs. Fresh plasterboard, a tidy bedroom repaint and a dark hallway being painted white don’t all start from the same place.
Start with the wall, not the roller
Good house painting starts before you open the tin. Grease, loose paint, sanding dust, and poorly finished repairs can spoil the result, regardless of how carefully you roll.
Think of preparation as part of the paint job itself. Another coat won’t flatten a raised patch or make a loose coating stick properly.
Clean and check the surface
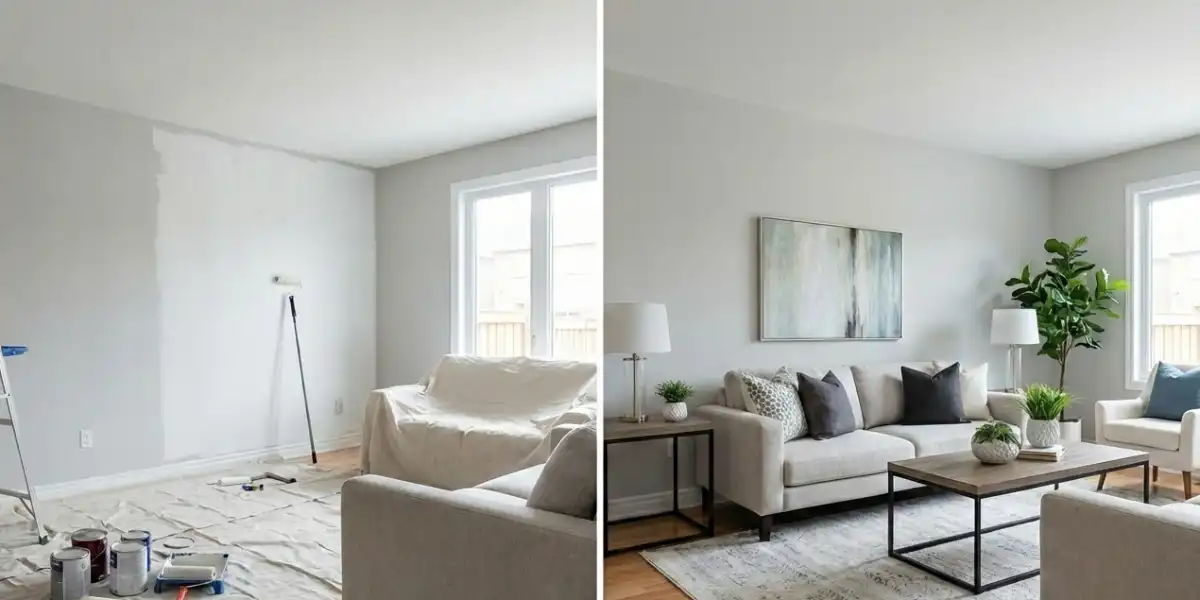
Move furniture clear, protect the flooring with drop sheets, and inspect the walls in good light. Pay particular attention to areas around light switches, behind furniture, and near cooking spaces.
Remove dirt and grease with a suitable cleaner, following its instructions.
Remove any cleaning residue as directed and let the wall dry.
Check for flaking paint, dents, cracks, and raised repairs.
Smooth sound surfaces where needed and remove sanding dust.
Resolve moisture problems before covering affected areas.
Dulux’s interior house painting guidance likewise calls for surfaces to be free of dirt, grease, loose paint and loose plaster.
Learn how to fill cracks in walls before painting
For a small, stable surface crack, remove loose material and dust, then apply an appropriate interior filler with a filling blade. Follow the product’s depth limits and drying instructions before sanding the repair flush.
Remove the sanding dust and spot-prime the repair as required by your paint system. Selleys provides fillers for wall repairs and separate flexible products for joints where movement occurs, such as gaps beside skirting boards.
A crack that keeps returning needs more attention than another skim of filler. Establish why it is moving before repainting it.
The standard rule: two topcoats, plus preparation where needed
When deciding how many coats of paint on walls are needed, separate the preparatory coating from the finishing coats. They do different jobs.
A primer helps the next coating adhere, a sealer controls absorption, and an undercoat helps establish a suitable base. Some products combine these functions, but they still need to suit the surface.
New plasterboard or bare repairs
New plasterboard and jointing compound can absorb paint differently. A suitable sealer or primer helps create a more uniform base before the finishing coats go on.
Follow the specified system rather than assuming every bare surface needs exactly one preparatory coat. For example, Dulux notes that its 1Step Prep may require a second coat on new paper-faced plasterboard with jointing compound to achieve an even finish.
Previously painted walls in good condition
A clean, sound wall with a compatible existing finish may not need full priming. Local repairs can require spot-priming, followed by the recommended topcoats across the wall; Dulux’s Wash&Wear guidance includes spot-priming repairs and applying two finishing coats.
Glossy, stained, or otherwise difficult surfaces need their own preparation approach. Check compatibility before putting a water-based wall paint over an unfamiliar coating.
Does primer count as a coat?
It counts as a layer in the overall system, but it doesn’t replace a specified finishing coat.
If you’re calculating how many layers of paint on a wall a new project involves, one preparatory coat plus two topcoats gives you three applied layers. That is different from applying three coats of your chosen wall colour.
Changing colours: when coverage gets trickier
Colour changes can affect how many coats of paint you need, particularly when there is a strong contrast between the old and new shades.
The goal is an even, opaque finish after drying. Don’t judge coverage while the wall is still wet.
Painting light over dark
Changing a charcoal feature wall to a soft white can expose uneven coverage more readily than repainting cream over cream. Plan for the recommended topcoats and assess whether the old colour still shows through afterwards.
Ask your paint supplier whether the selected colour and product would benefit from a particular undercoat. A suitable base can help, but it doesn’t automatically remove the need for the specified finishing coats.
Painting dark over light
A deep colour doesn’t necessarily cover in one pass simply because it looks stronger. Coverage depends on the paint formulation, tint base, application and underlying surface.
For rich reds, strong yellows and other demanding colours, check whether the manufacturer specifies a tinted undercoat or additional coats. Avoid adding tint to a primer yourself unless the product allows it.
Is 3 coats of paint too much?
A third coat can be reasonable when two correctly applied coats haven’t achieved full coverage. It should have a clear purpose, rather than being added automatically.
An extra finishing coat may be appropriate when:
The previous colour remains visible after drying.
The selected colour’s instructions call for additional coats.
Coverage is still uneven despite suitable preparation and correct application.
However, more paint won’t fix every patchy wall. A visible repair might need better sealing, a ridge needs smoothing, and loose paint needs removal.
Before adding another coat, identify what you’re seeing. Uneven colour and uneven surface texture are different problems.
If the finish is already uniform and the specified coating system is complete, another coat may offer little practical benefit. It adds material and drying time without necessarily improving the result.
Apply each coat properly
The answer to how many coats of paint on walls will produce a good result depends partly on what you call a coat. Stretching a nearly dry roller across an entire room doesn’t deliver the same coverage as applying paint at its recommended spreading rate.
Follow the product instructions for application. One heavy coat is not a substitute for two properly applied coats.
For a more consistent finish:
Stir the paint thoroughly before use.
Choose the recommended roller sleeve for the product and surface.
Cut in manageable sections around corners, cornices and architraves.
Roll adjoining areas while the edges remain workable.
Reload the roller regularly rather than pressing harder as it empties.
Avoid repeatedly rolling over paint that has started to set.
Give the first coat enough time
Check the label’s recoating interval and the conditions it applies to. A cool room or humid weather can affect drying, so don’t organise the whole job around the quickest time printed on the tin.
Touch-dry also doesn’t mean fully cured. Follow the manufacturer’s guidance before washing freshly painted walls or exposing them to heavy wear.
Pro Tip: check the wall from the side
Before packing up, look along the wall towards a window, rather than only looking straight at it. Light travelling across the surface makes roller ridges and raised patches easier to spot.
Check again once the paint has dried, under the lighting you normally use in the room. It’s much easier to make a sensible decision then than while wet patches are reflecting light differently.
Frequently asked questions
How many times can you paint a wall?
There is no universal number of times you can repaint a wall. The condition and adhesion of the existing coatings matter more than the number of times someone has changed the colour.
Sound paint can often be prepared and repainted. If old coatings are peeling, heavily textured or poorly bonded, further preparation or removal may be needed before another repaint.
Can one coat be enough when refreshing the same colour?
It may look covered after one coat, but appearance alone doesn’t confirm that you have completed the required paint system. Follow the product’s specified coat count, even when the colour change is minimal.
Why does the wall still look patchy after two coats?
Possible causes include uneven application, absorbent repairs, incomplete drying or the previous colour showing through. Work out which issue is responsible before buying more paint.
Ask “how many coats of paint?” only after checking the surface and application. Otherwise, you can keep adding layers without solving the underlying problem.
What should you plan for before starting?
If you’re deciding how many coats of paint for interior walls to allow for, start with two finishing coats and the preparation your surface requires. Keep room in the schedule for drying and any extra coverage your chosen colour needs.
Clean thoroughly, repair carefully, and follow the paint system from start to finish. That’s what gives you an even wall you’ll still be happy with when the furniture goes back.
If you are planning to refresh your home, one of the most common and important questions is: how many coats of paint are
How many coats of paint are required for interior ceilings compared to walls?
Ceilings usually require two coats, similar to walls. However, ceilings often reflect light differently and may reveal roller marks more easily. Using a flat ceiling-specific paint and maintaining consistent roller pressure reduces the need for extra coats.
Can I apply thicker coats instead of multiple coats of paint on interior walls?
Applying excessively thick coats is not recommended. Thick application increases drying time, can cause sagging or cracking, and may lead to uneven curing. Two properly applied medium coats will always outperform one heavy coat in terms of durability and appearance.
Will using a primer reduce the number of coats of paint needed for interior walls?
In many cases, yes. A high-quality primer improves adhesion and creates a uniform base, which enhances coverage efficiency. Particularly when changing colours dramatically, priming may prevent the need for a third finish coat.